

How to Maintain Cedar Sauna Wood: 2026 Guide
Table of Contents
- Step 1: Daily and Weekly Cleaning Routines
- Step 2: The Best Cleaner for Cedar Sauna Wood
- Step 3: How to Sand Sauna Benches and High-Contact Surfaces
- Step 4: Applying Wood Preservative and Cedar Oil
- Step 5: Managing Moisture Content, Ventilation, and Humidity
- Step 6: Preventing Mold, Mildew, and Discoloration
- Step 7: Your Sauna Wood Maintenance Schedule
- Conclusion: Protect Your Cedar Sauna Investment
- Frequently Asked Questions
Last Updated: September 30, 2026
Step 1: Daily and Weekly Cleaning Routines
Cedar sauna wood stays beautiful for decades with a simple cleaning rhythm. This guide from Heaven 417 covers every step, from daily wipe-downs to seasonal deep cleans. Most owners wait until the wood looks dull before acting, that is a mistake.

Here is the daily routine:
- Lay a towel on the bench before you sit
- Wipe benches with a dry cloth after each session
- Leave the door open for 10-15 minutes to air out
- Check for standing water near the heater
Once a week, do a bit more:
- Damp wipe benches with a cloth and warm water
- Scrub high-contact surfaces where hands and feet rest
- Vacuum floor corners with a soft brush
- Inspect the wood for new stains or dark spots
Step 2: The Best Cleaner for Cedar Sauna Wood
Most guides stop at "use mild soap and water," which leaves you guessing when a bench has a sweat ring, a floor board smells musty, or a wall panel has a gray haze. The right cleaner depends on what you are removing, and on cedar's chemistry.
Match the cleaner to the problem
| Surface issue | Best cleaner | Why it works | Avoid |
|---|---|---|---|
| Everyday sweat and body oil | pH-neutral soap + warm water | Lifts residue without stripping cedar oils | Bleach, ammonia, scented sprays |
| Light surface mildew (white/green fuzz) | Diluted white vinegar (1:1 with water) | Mildly acidic; disrupts surface mold | Full-strength vinegar on finished wood |
| Musty smell, no visible growth | Warm water + a few drops of tea tree or eucalyptus oil | Natural antimicrobial; sauna-safe aroma | Fragrance oils with synthetic carriers |
| Pitch or sap smudge | A drop of food-grade mineral oil on a cloth | Dissolves resin without water soaking the grain | Solvents, acetone, paint thinner |
| Gray, dried-out panels | Cedar oil (not a cleaner) | Replenishes oils; restores color | Soap alone, it cannot re-oil wood |
Three tested DIY recipes
These are the mixes most cedar owners land on. All are non-toxic and safe once the sauna has cooled.
1. Everyday wipe-down
- 1 gallon warm water
- 1 teaspoon mild pH-neutral soap (castile soap works well)
- Optional: 2-3 drops cedar oil
2. Surface mildew spray
- 1 cup white vinegar
- 1 cup water
- Optional: 5 drops tea tree oil
3. Deep-clean paste for stubborn stains
- 2 tablespoons baking soda
- 1 tablespoon water
- 1 teaspoon mild soap
What to never put on cedar
- Bleach or ammonia, damages grain and releases fumes when the sauna heats
- Abrasive pads or steel wool, scratch the surface and open the grain to future staining
- Varnish, polyurethane, or thick sealants, trap moisture, crack under heat, and off-gas
- Heavy-fragrance cleaners, synthetic carriers can bake into the wood and linger
Non-toxic cleaners protect both your lungs and the wood's natural pitch and sap. When in doubt, start with the gentlest option and escalate only if the stain persists.
Step 3: How to Sand Sauna Benches and High-Contact Surfaces
Sanding is the step most owners skip, yet it keeps benches smooth and safe. Over time, sweat and heat raise the wood grain, and rough spots snag skin and hold bacteria.
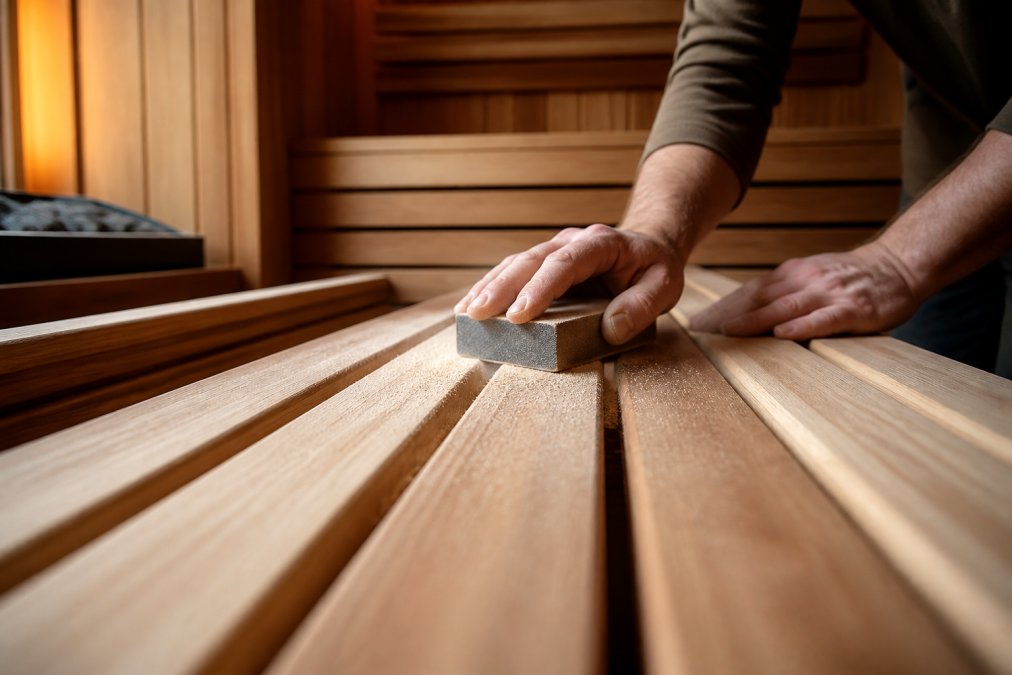
How to sand sauna benches follows a simple order:
- Empty the sauna and let it cool completely
- Wipe down all surfaces first
- Start with 120-grit sandpaper on rough areas
- Move to 180-grit for a smooth finish
- Always sand with the wood grain, never against it
- Wipe away all dust with a tack cloth
- Apply a light coat of cedar oil to finish
Step 4: Applying Wood Preservative and Cedar Oil
Cedar oil and paraffin oil are the two best choices for protecting sauna wood. Both soak into the grain and help it hold its natural moisture balance.
- Warm the oil slightly for better absorption
- Apply a thin coat with a lint-free cloth
- Work in the direction of the wood grain
- Let it sit for 20-30 minutes
- Wipe off any excess
- Let the sauna air out for 24 hours before use
Step 5: Managing Moisture Content, Ventilation, and Humidity
Moisture content is the biggest factor in how long cedar sauna wood lasts. Wood that stays damp grows mold; wood that dries too fast cracks.
Auris One Luxury Outdoor Cedar Sauna →

Target these conditions:
- Relative humidity: 10-20% when not in use
- Airflow: cross-ventilation during and after sessions
- Wood moisture content: 6-12% is ideal for cedar
Step 6: Preventing Mold, Mildew, and Discoloration
Not every dark spot on cedar is mold. Sweat stains, tannin bleed, water damage, and mildew look similar but each has a different fix, and misdiagnosing them can make things worse. Use this triage table before you reach for a cleaner.
Stain diagnostic table
| What you see | Likely cause | Test | Fix |
|---|---|---|---|
| Dark brown streaks on bench tops and backrests | Sweat and body oil buildup | Dry to the touch; fades slightly when wiped with warm water | Sand lightly with 180-grit, then re-oil |
| Black or dark green speckles, often in corners or near the floor | Mildew or mold | Musty smell; smudges when wiped; may feel slightly damp | Vinegar spray, dry fully, improve airflow |
| White or gray powdery film | Efflorescence (mineral salts) or dried soap residue | Wipes off easily; no smell | Damp cloth with plain water; do not re-soap |
| Yellow-brown blotches near knots | Pitch or tannin bleed | Sticky or tacky to the touch | Mineral oil on a cloth; do not use water |
| Soft, spongy, or crumbly wood | Rot from prolonged moisture | Screwdriver tip sinks in easily | Stop using the sauna; the affected board likely needs replacement |
| Uniform gray, no smell, dry | UV and heat oxidation of the wood surface | Dry, no growth, no odor | This is cosmetic, sand and re-oil |
Why cedar is more resistant, but not immune
Cedar's natural oils and resins make it more rot- and insect-resistant than most softwoods, but that resistance is not a force field. Mold needs three things: moisture, organic material (sweat, skin cells, soap residue), and still air. Remove any one and growth stalls.
Step-by-step remediation
For light surface mildew:
- Let the sauna cool completely
- Spray the area with the 1:1 vinegar-and-water mix
- Let it sit 5 minutes
- Wipe with the grain using a soft cloth
- Dry the surface with a clean towel
- Leave the door open and run a fan for at least an hour
For stains that survive the vinegar wipe:
- Sand the area lightly with 180-grit paper, always with the grain
- Wipe away dust with a tack cloth
- Apply a thin coat of cedar oil
- Let it absorb 20-30 minutes, then wipe off excess
- Air the sauna out for 24 hours before use
For soft or spongy wood: Stop. Rot means moisture has been trapped long enough to break down the wood fibers, and surface treatment will not fix it. The affected board or panel needs replacing, and the moisture source, a leak, a blocked vent, or a floor that never dries, must be corrected first.
Prevention beats remediation
- Dry the wood after every session. A 30-second wipe with a dry cloth removes the sweat and oils mold feeds on.
- Move the air. Cross-ventilation during and after sessions is the single most effective mold preventive.
- Fix drips immediately. A slow leak behind a bench can feed mold for months before you see it.
- Inspect monthly. Check corners, under benches, and near the floor, the spots that stay damp longest.
- Watch the humidity. When the sauna is not in use, aim for 10-20% relative humidity and wood moisture content of 6-12%.
Step 7: Your Sauna Wood Maintenance Schedule
A written schedule keeps cedar sauna wood in top shape without guesswork. Here is a simple plan you can follow year-round.
| Task | Frequency | Time Needed |
|---|---|---|
| Dry wipe benches | After each session | 2 minutes |
| Damp wipe and air out | Weekly | 10 minutes |
| Inspect for stains and mold | Monthly | 15 minutes |
| Deep clean with pH-neutral soap | Quarterly | 45 minutes |
| Sand and oil benches | Every 6-12 months | 2-3 hours |
| Check heater and vents | Seasonal | 20 minutes |
Conclusion: Protect Your Cedar Sauna Investment
A cedar sauna rewards owners who treat it like a long-term investment. Daily wipes, weekly checks, and a yearly sand-and-oil session keep the wood strong and the space inviting.
Frequently Asked Questions
Can you use soap and water to clean cedar sauna wood?
Yes, but use a pH-neutral soap diluted in warm water and a soft cloth. Avoid harsh detergents, bleach, or abrasive pads that can strip the wood's natural oils and raise the grain. After wiping, dry the surface with a clean towel to prevent moisture from soaking in. For deeper cleaning, use a cedar-specific cleaner rather than general household products.
How often should you sand cedar sauna benches?
Sand benches when the surface feels rough, shows dark sweat stains, or absorbs water unevenly, typically every 1 to 2 years for daily-use saunas. Use 120-grit sandpaper first, then finish with 180-grit. Always sand with the grain and vacuum dust before applying any oil or preservative.
Should you seal or stain the interior of a cedar sauna?
No. Interior cedar should remain untreated so it can absorb and release moisture naturally. Sealants and stains trap heat, release fumes when hot, and prevent the wood from breathing. Instead, use a light coat of paraffin oil or cedar oil on high-contact surfaces like benches and backrests to protect against sweat and oils.
How do you remove sweat stains from sauna wood?
Mix a small amount of pH-neutral soap with warm water and scrub gently with a soft-bristle brush. For stubborn stains, create a paste of baking soda and water, apply it, and let it sit for 10 minutes before wiping clean. Rinse with a damp cloth and dry thoroughly. If the stain has penetrated, sand the area lightly with 180-grit paper.