

240V Sauna Installation: Electrical Requirements Guide
Table of Contents
- Understanding 240V Sauna Electrical Basics
- Dedicated Circuit and Breaker Specifications for 240V Saunas
- Sauna Wiring Gauge Requirements and Wire Selection
- NEC Electrical Code for Saunas and Compliance Standards
- Outdoor Sauna Electrical Disconnect Switch Installation
- Hiring a Licensed Electrician for Sauna Installation
- Permits, Inspections, and Local Building Code Compliance
- Frequently Asked Questions
Last Updated: September 18, 2026
Understanding 240V Sauna Electrical Basics
A 240V sauna installation requires dedicated electrical infrastructure designed to safely deliver the power your sauna heater needs. Most traditional and infrared saunas operate on 240-volt circuits, which provide the efficiency and performance necessary for consistent heat output. Understanding these baseline requirements before you install is essential, mistakes here are expensive to fix.
The difference between 120V and 240V matters. A 120-volt circuit splits the load across two wires. A 240-volt circuit delivers power more efficiently, which is why sauna heaters demand it. Your sauna's electrical panel, wiring, breaker, and disconnect switch must all be rated for this voltage. Get any of these wrong, and you're looking at fire risk, equipment damage, or a failed inspection.
At Heaven 417, we guide customers through these requirements because the electrical setup determines whether your sauna runs safely and reliably for years. The good news: the process is straightforward once you know what to specify.
Dedicated Circuit and Breaker Specifications for 240V Saunas
Your sauna requires its own dedicated circuit, not a shared one. This circuit runs directly from your electrical panel to your sauna location. A dedicated circuit ensures your sauna heater gets the full amperage it needs without competing with other appliances.
Most residential saunas draw between 30 and 60 amps, depending on heater size and capacity. A typical 4-person sauna might require 40 amps. A smaller 2-person unit could run on 30 amps. Check your sauna's specifications for the exact amperage rating before you order materials.
Your breaker must match your sauna's amperage:
- 30-amp sauna = 30-amp, 2-pole breaker
- 40-amp sauna = 40-amp, 2-pole breaker
- 60-amp sauna = 60-amp, 2-pole breaker
The 2-pole breaker is critical. A 2-pole breaker protects both legs of the 240-volt circuit simultaneously. If one leg overloads, both shut down together. This is a safety requirement, not an option.
Your electrical panel must have available space for this breaker. If your panel is full, you'll need a sub-panel installed, an additional cost. A licensed electrician can assess your panel and advise whether expansion is necessary.
Sauna Wiring Gauge Requirements and Wire Selection
Wire gauge determines how much current can safely flow without overheating. The National Electrical Code (NEC) specifies minimum gauges based on amperage and distance from the panel to your sauna.
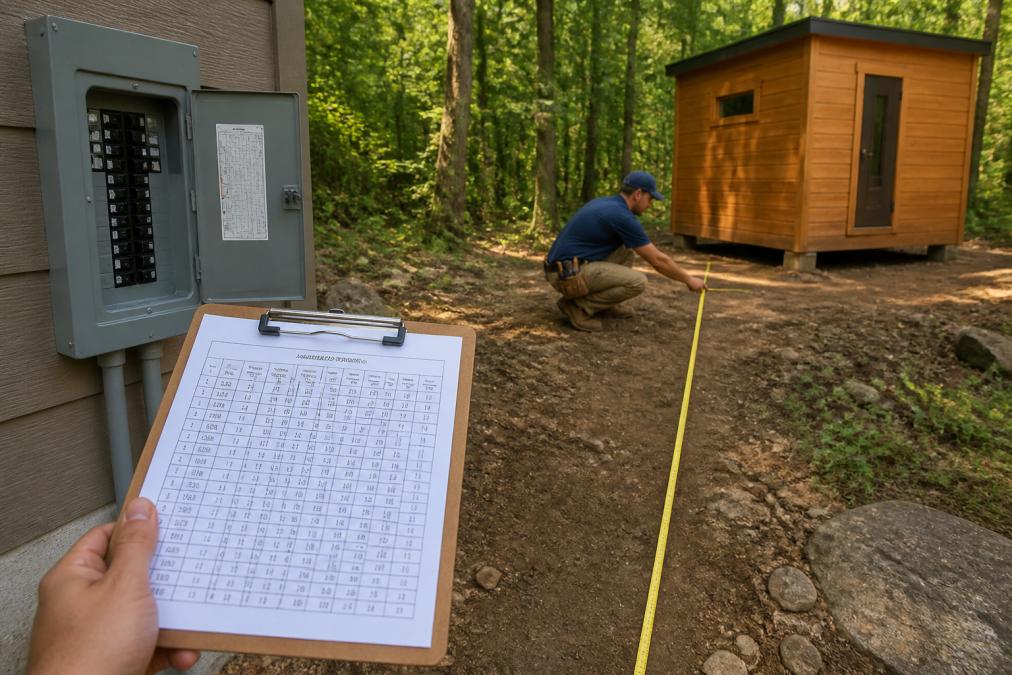
Common wire gauge requirements (for runs under 100 feet):
- 30-amp circuit: 10 AWG copper wire (minimum)
- 40-amp circuit: 8 AWG copper wire (minimum)
- 60-amp circuit: 6 AWG copper wire (minimum)
Always use copper wire, not aluminum. Copper conducts electricity more efficiently and is the standard for residential sauna installations.
Voltage Drop and Distance-Based Wire Sizing
Distance from your electrical panel to the sauna location is critical. Voltage drop occurs when power is lost over long wire runs, causing your sauna heater to receive less than the full 240 volts it needs. This reduces heating performance and can damage the heating element over time.
How to calculate required wire gauge for distance:
- Measure the total distance from your electrical panel to the sauna location (round trip: out and back).
- Find your circuit amperage (30, 40, or 60 amps).
- Use the voltage drop formula: Voltage Drop = (2 × Distance × Amperage × Resistance) ÷ 1000
- Resistance for copper wire at 90°C: 10 AWG = 1.21 ohms per 1,000 feet; 8 AWG = 0.76 ohms per 1,000 feet; 6 AWG = 0.48 ohms per 1,000 feet
Practical example: A 40-amp sauna located 150 feet from the panel:
- Using 8 AWG: (2 × 150 × 40 × 0.76) ÷ 1000 = 9.1 volts drop (3.8%, exceeds the 3% limit)
- Using 6 AWG: (2 × 150 × 40 × 0.48) ÷ 1000 = 5.8 volts drop (2.4%, within code)
- Conclusion: 6 AWG is required, not the standard 8 AWG for 40 amps
Wire protection and outdoor requirements:
NEC Electrical Code for Saunas and Compliance Standards
The National Electrical Code (NEC) is the standard that governs all residential electrical installations in the United States. Article 682 of the NEC covers sauna electrical requirements specifically. These aren't suggestions, they're mandatory for safety and inspections.
Key NEC requirements for saunas:
- All sauna circuits must be GFCI protected if installed indoors or in damp environments
- Sauna heaters must have a disconnect switch within sight of the heater
- All wiring must be in conduit or approved cable
- Outdoor saunas require weatherproof junction boxes and connections
- Bonding and grounding must be properly installed to prevent shock hazards
Outdoor Sauna Electrical Disconnect Switch Installation
A disconnect switch is a safety device that cuts power to your sauna instantly. The NEC requires a disconnect switch within sight of the sauna heater, typically mounted on an exterior wall or post near the sauna entrance.
The disconnect switch must be:
- Rated for 240V and the full amperage of your circuit (30-amp, 40-amp, or 60-amp)
- Weatherproof and outdoor-rated
- Clearly labeled "Sauna Disconnect"
- Accessible without moving obstacles
- Mounted between 40 and 48 inches above ground (standard height)
Hiring a Licensed Electrician for Sauna Installation
This is not a DIY project. A licensed electrician brings the expertise, tools, and insurance to do this safely and pass inspection.
Why hire a professional:
-
They understand local code amendments and permit requirements
-
They perform voltage drop calculations for long runs
-
They install conduit, grounding, and bonding correctly
-
They pull permits and schedule inspections
-
Their work is insured and warrantied
-
A failed DIY installation voids most sauna warranties
-
Circuit size and breaker type
-
Wire gauge and conduit specifications
-
Disconnect switch location and type
-
Permit and inspection costs
-
Timeline for completion
Permits, Inspections, and Local Building Code Compliance
A permit is required for any permanent sauna installation. The permit process protects you by ensuring your installation meets code and is safe.
The permit process typically includes:
- Submit electrical plans showing circuit design, breaker size, wire gauge, disconnect location, and conduit/trenching specifications (if wiring is buried)
- Pay the permit fee (typically $50-$200, varies by jurisdiction)
- Schedule a rough-in inspection after wiring is installed but before the sauna is connected
- Schedule a final inspection after the sauna is fully operational
- Receive a certificate of compliance
Trenching and Conduit Requirements for Outdoor Buried Runs
If your sauna is located more than a short distance from your electrical panel, the wire run may need to be buried underground to avoid tripping hazards and weather exposure. Buried conduit and trenching are governed by local electrical code and the NEC, and inspectors will verify compliance during the rough-in inspection.
Minimum burial depth for 240V sauna circuits:
- Direct burial cable (USE-2 or RHW-2): 24 inches minimum depth
- PVC conduit with individual THHN wires: 18 inches minimum depth
- Rigid metal conduit (RMC): 6 inches minimum depth (less common for residential, but allowed)
Conduit material selection:
- Schedule 40 PVC conduit: Most common for residential outdoor sauna installations. UV-rated PVC is required if any portion is exposed above ground. PVC is affordable, corrosion-resistant, and easy to install. Individual THHN wires run inside the conduit.
- Rigid Metal Conduit (RMC): Galvanized steel, more durable and impact-resistant than PVC but more expensive and labor-intensive. Often used in high-traffic areas or where mechanical protection is critical.
- Direct burial cable (USE-2): A single armored cable rated for direct burial without conduit. Faster to install than conduit but less flexible for future modifications. Some jurisdictions prefer conduit for easier wire replacement.
Trenching best practices:
- Dig a straight trench from the electrical panel to the sauna location, avoiding sharp bends that can damage wire insulation
- Lay a warning tape (typically bright orange or red) 12 inches above the buried conduit so future digging alerts workers to the electrical line
- Backfill the trench with native soil, avoiding rocks or debris that could puncture conduit
- If the run crosses a driveway or high-traffic area, use Schedule 40 PVC or RMC to provide extra protection
- Mark the buried line on your property map and inform family members or future owners of its location
Conduit entry at the sauna:
Local amendments and variations:
- GFCI protection for outdoor circuits (see the GFCI Debate section below for nuance)
- Additional grounding rods for outdoor installations (typically a second 8-foot copper rod bonded to the main grounding electrode)
- Specific conduit types (some areas prohibit PVC and require RMC for all outdoor runs)
- Trenching depth requirements deeper than the NEC minimum, especially in freeze-thaw climates
- Conduit sleeves under driveways or patios to allow for future wire replacement
Frequently Asked Questions
What are the electrical requirements for a 240V sauna installation?
A 240V sauna requires a dedicated circuit from your electrical panel with a 2-pole breaker sized to match the heater's amperage rating. Most residential saunas draw 30-50 amps. You'll need appropriately sized copper wire (typically 8 AWG to 4 AWG depending on amperage and distance), outdoor-rated conduit for exposed runs, proper grounding and bonding, and an accessible disconnect switch within sight of the sauna. All work must comply with NEC electrical code and local building codes.
Does a 240V sauna heater require a neutral wire?
No. A 240V sauna heater does not require a neutral wire. It operates on two hot legs of 120V each, totaling 240V. The circuit only needs the two hot conductors, a ground wire for safety, and a disconnect switch. This differs from 120V circuits, which require a neutral return path. Always verify your specific heater's wiring diagram, as some models may have control circuits that reference neutral, but the heating element itself operates on 240V only.
Do I need a permit to install an outdoor sauna?
Yes, most jurisdictions require an electrical permit for sauna installation because it involves new circuits, dedicated breakers, and hardwiring into your main electrical panel. Some areas also require building permits for the sauna structure itself, especially if it's a permanent installation. Permit requirements vary by location. Contact your local building department before starting work. Unpermitted electrical work can void insurance coverage, create safety hazards, and cause problems when selling your home.
How far should the electrical disconnect switch be from the sauna?
The disconnect switch must be within sight of the sauna, typically defined as within 50 feet and with an unobstructed line of sight. The switch should be mounted on a post, wall, or structure outside the sauna, positioned at a safe, accessible height (usually 3.5 to 5.5 feet from the ground). It must be weatherproof and rated for outdoor use. This allows someone to quickly shut off power in an emergency without entering the sauna or losing visual contact with it.